Machined Tutorial: Learn CNC Machining From Zero to First Part
Machining can feel intimidating when you are staring at a mill for the first time. There are tools to select, speeds to calculate, setups to plan, and a whole vocabulary that sounds like a foreign language. But the core process is more approachable than it looks. This machined tutorial walks through the fundamentals in a practical order: what machining actually is, the machines you will encounter, how to plan a simple job, the calculations that keep tools alive, and a realistic first project you can complete without a full machine shop.
What Machining Actually Means
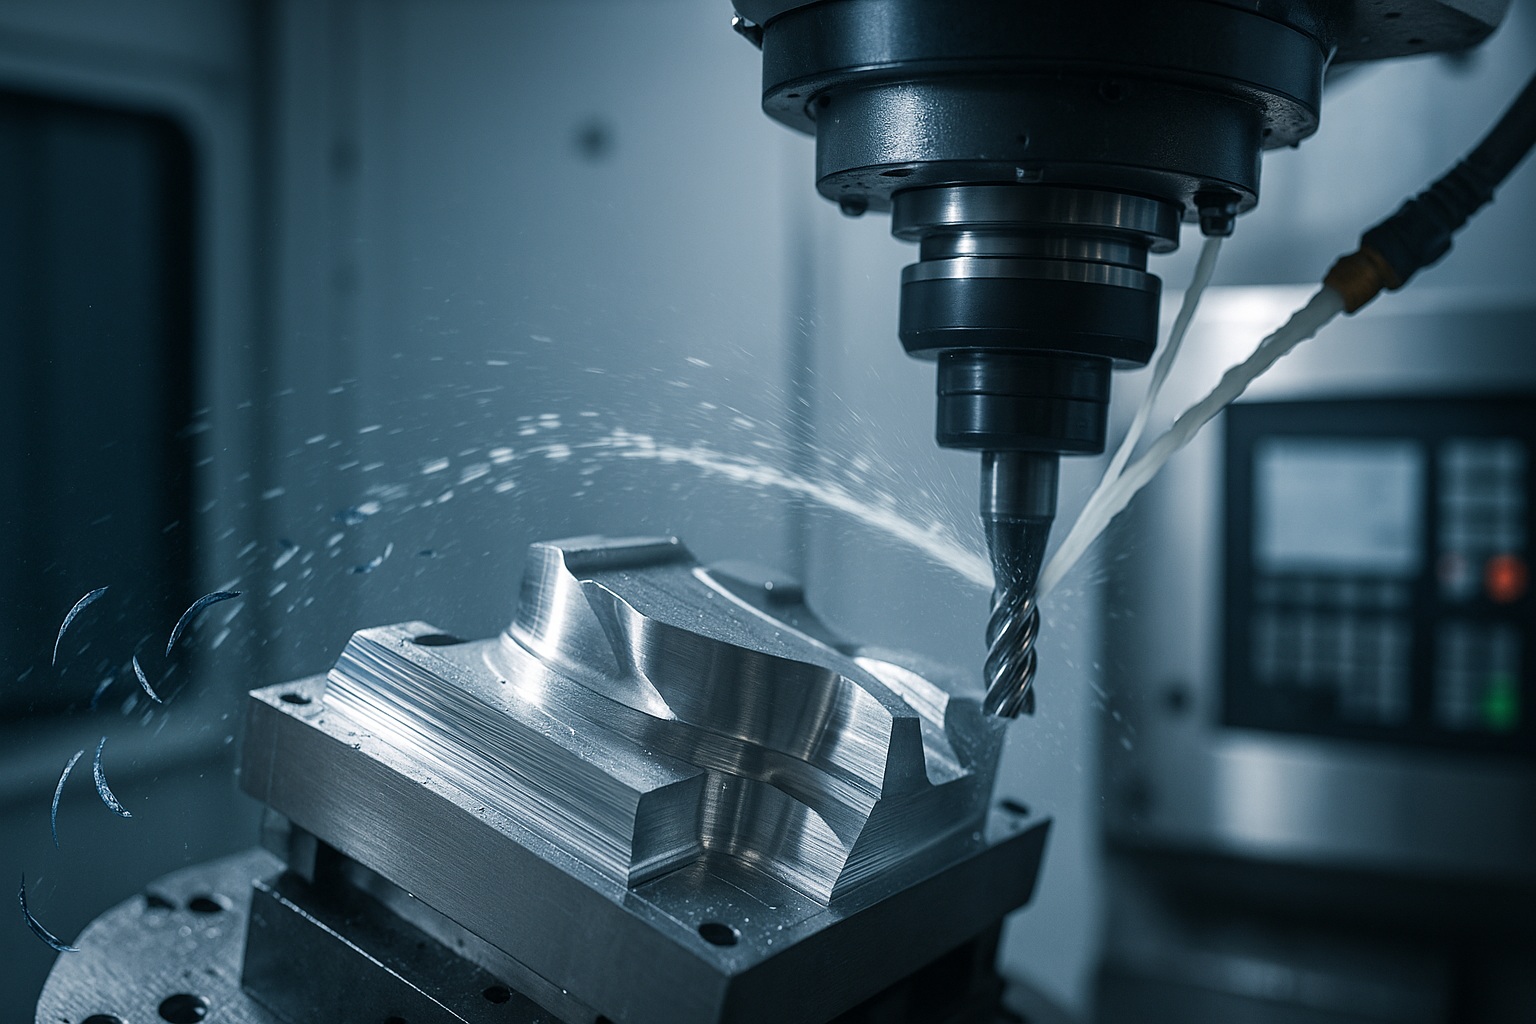
Machined Tutorial: Learn CNC Machining From Zero to First Part - What Machining Actually Means.
Machining is a subtractive manufacturing process. You start with a piece of raw material—usually metal, but sometimes plastic or wood—and remove material until the remaining shape matches your design. This is the opposite of 3D printing, which adds material layer by layer, and different from casting or molding, which force material into a shape.
The defining feature of machining is control. A cutting tool moves along defined paths, and the machine removes material in predictable increments. That predictability is what makes machining suitable for parts that need tight tolerances, repeatable results, or specific surface finishes.
Two broad categories matter for beginners:
- Manual machining: You turn handwheels and operate levers to move the cutting tool. You feel the cut, watch the chips, and make adjustments in real time.
- CNC machining: A computer controls tool movement based on a program. You design the part, generate toolpaths, and the machine executes them.
Most hobbyists and job shops use both. Manual work builds intuition about how material responds to cutting. CNC work scales that intuition into repeatable production.
The Core Machines You Need to Understand
Machined Tutorial: Learn CNC Machining From Zero to First Part - The Core Machines You Need to Understand.
You do not need to master every machine on day one. Focus on the two workhorses that cover most beginner projects.
The Milling Machine
A mill uses a rotating cutting tool to remove material from a stationary or moving workpiece. Think of it as a drill that can move sideways. Mills excel at creating flat surfaces, slots, pockets, holes, and complex 3D contours.
Key parts to recognize:
- Spindle: Holds and rotates the cutting tool.
- Table: Supports the workpiece and moves in X, Y, and sometimes Z axes.
- Column and knee: Provide vertical adjustment and rigidity.
- Vise or clamps: Secure the workpiece to the table.
A full introduction to mills covers when to choose one over other machines, how the axes interact, and what a basic setup looks like. The core idea is that the mill gives you three-dimensional control over where the tool meets the material.
The Lathe
A lathe spins the workpiece while a stationary cutting tool removes material. It is ideal for cylindrical parts: shafts, bushings, pins, and anything round. Operations include facing, turning, drilling, boring, and threading.
Most beginner projects use either a mill or a lathe, not both. Start with the machine that matches the shape you want to make. If your part is mostly flat or boxy, choose a mill. If it is round, choose a lathe.
Planning Your First Machining Job
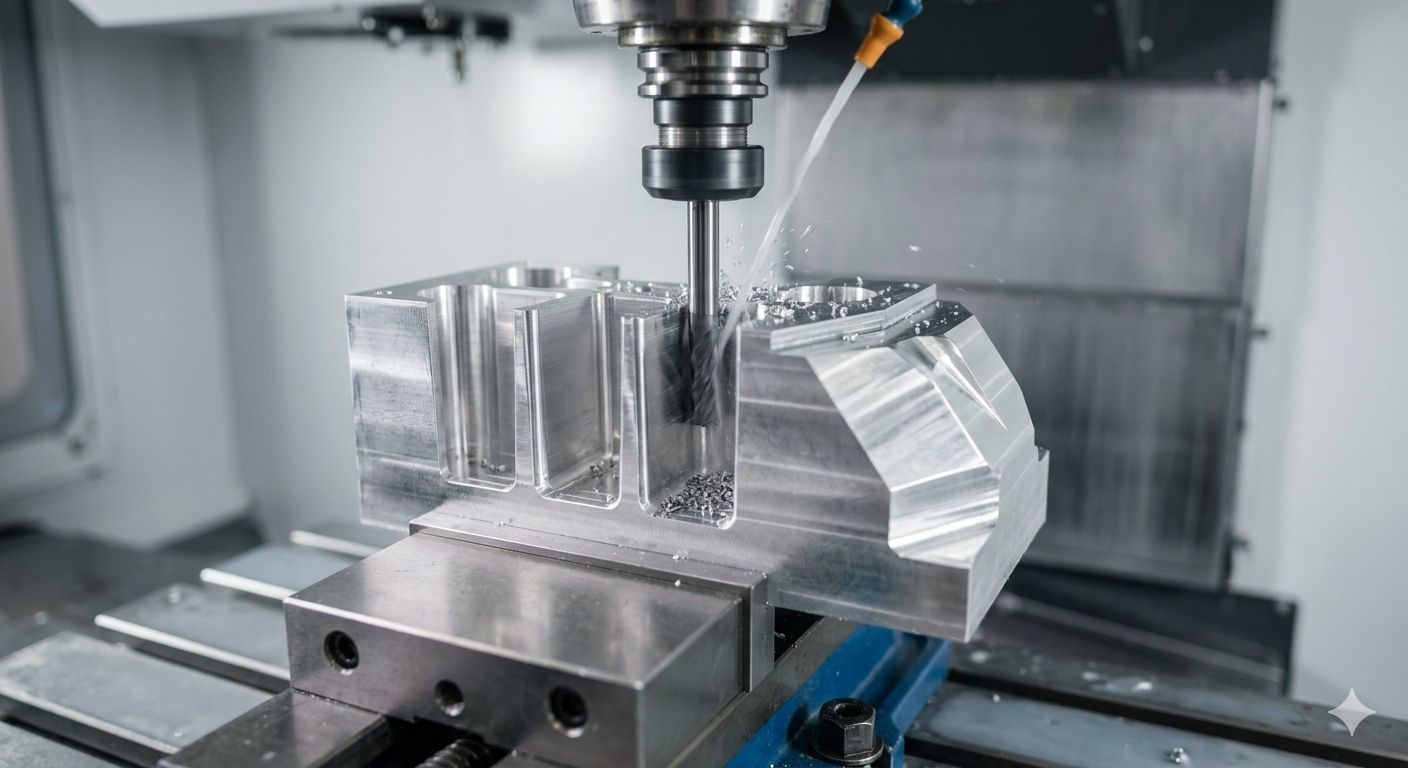
Machined Tutorial: Learn CNC Machining From Zero to First Part - Planning Your First Machining Job.
Before touching a machine, plan the job on paper. This step prevents most beginner mistakes.
Step 1: Define the Finished Part
Sketch the part with dimensions. Note the material, required tolerances, and any features that need special attention, such as threads or tight bores. A simple sketch is enough. You are not designing for production yet.
Step 2: Choose Your Stock
Select raw material slightly larger than the finished part. The extra material gives you something to hold onto during setup and room to clean up surfaces. Common beginner materials include aluminum 6061, brass, and mild steel. Aluminum is the most forgiving: it cuts easily, produces clean chips, and does not wear out tools quickly.
Step 3: Break the Job Into Operations
List every cutting operation in order. For a simple milled part, that might look like:
- Face the top surface flat.
- Mill the outer profile to size.
- Drill holes.
- Chamfer edges.
Each operation needs its own tool, speed, and feed. Writing the list forces you to think through the entire workflow before you start cutting.
Step 4: Plan Workholding
Decide how you will hold the stock for each operation. A milling vise is the default for rectangular parts. Clamps work for larger or irregular shapes. The rule is simple: the workpiece must not move during the cut. If it can shift, the tool will break or the part will be scrapped.
Feeds and Speeds Without the Guesswork
Machined Tutorial: Learn CNC Machining From Zero to First Part - Feeds and Speeds Without the Guesswork.
Feeds and speeds are the most common source of beginner anxiety. The concept is straightforward: the cutting tool must move through the material at a rate that removes material efficiently without overheating or breaking.
Speed (Spindle RPM)
Spindle speed depends on the cutting tool material and the workpiece material. The basic formula is:
RPM = (Cutting Speed × 1000) / (π × Tool Diameter)
Cutting speed is measured in surface feet per minute (SFM) or meters per minute (m/min), and it varies by material. Aluminum typically allows higher cutting speeds than steel. Carbide tools can run faster than high-speed steel (HSS).
For a beginner, the practical approach is to use manufacturer-recommended values. Tool suppliers publish speed and feed charts for their products. Start at the conservative end of the range.
Feed Rate
Feed rate is how fast the tool advances through the material, usually measured in inches per minute (IPM) or millimeters per minute. It depends on spindle speed, the number of cutting edges on the tool, and the chip load per tooth.
Feed Rate = RPM × Number of Flutes × Chip Load
Chip load is the thickness of material each cutting edge removes per revolution. Again, tool manufacturers provide recommended chip loads for different materials.
Depth and Width of Cut
Depth of cut is how deep the tool plunges into the material vertically. Width of cut is how much of the tool diameter engages the material horizontally. Beginners should take lighter cuts. A shallow depth of cut with a moderate feed rate produces better finishes and fewer broken tools than an aggressive cut.
A Practical Starting Point
For a 1/4-inch HSS end mill in aluminum 6061:
- Spindle speed: 3,000–4,000 RPM
- Feed rate: 10–20 IPM
- Depth of cut: 0.050–0.100 inches
These are conservative starting points, not universal rules. Adjust based on how the machine sounds and how the chips look. Continuous, curled chips usually indicate a healthy cut. Dust-like particles or a chattering sound mean something is off.
A Beginner-Friendly First Project: The Parallel Clamp
A parallel clamp is a simple rectangular block with two holes and a slot. It teaches facing, profiling, drilling, and slotting—the four operations that cover most beginner mill work.
What You Need
- Aluminum 6061 stock, roughly 1 × 1 × 3 inches
- 1/4-inch HSS end mill
- 1/8-inch drill bit
- Milling vise
- Edge finder or dial indicator
Operation 1: Face the Top
Mount the stock in the vise with the top surface exposed. Use the end mill to remove a thin layer until the surface is flat and clean. This gives you a reference surface for all subsequent measurements.
Operation 2: Mill the Profile
Machine the outer edges to final dimensions. Take light passes and measure frequently. This is where you learn how much material a single pass actually removes.
Operation 3: Drill the Holes
Spot-drill the hole locations first to prevent the drill from wandering. Then drill through with the 1/8-inch bit. Use cutting fluid to keep the drill cool and improve hole quality.
Operation 4: Cut the Slot
Use the end mill to cut a slot between the two holes. This is the trickiest operation because the tool is fully engaged in the material. Reduce the depth of cut and feed rate for the slot.
The finished clamp is not a precision instrument, but it is a real machined part. You will have faced, profiled, drilled, and slotted—the same operations used on production parts.
Manual vs. CNC: Which Should You Learn First?
This is a common question, and the answer depends on your goals.
Start with manual machining if:
- You want to understand how material responds to cutting forces.
- You plan to work on one-off repairs or custom parts.
- You have access to a manual mill or lathe.
- You enjoy the hands-on, tactile nature of the work.
Start with CNC if:
- You want to make parts for production or repeatable runs.
- You are comfortable with CAD and CAM software.
- You have access to a CNC machine or a makerspace with one.
- Your parts have complex geometry that would be tedious to machine manually.
Many machinists recommend learning manual basics first, even if your end goal is CNC. Manual work teaches you what a good cut feels and sounds like. That intuition transfers directly to CNC, where you are not physically feeling the cut but still need to recognize problems from sound, chips, and surface finish.
Getting started in machining as a hobby does not require a huge investment. A used benchtop mill, a basic set of end mills, a vise, and measuring tools are enough to complete the parallel clamp project and many others.
Common Beginner Mistakes and How to Avoid Them
1. Skipping the Setup
The most common beginner mistake is rushing into the cut without checking that the workpiece is secure and the tool is properly seated. A loose vise or an improperly tightened collet can turn a simple cut into a dangerous situation. Always check workholding and tool holding before starting the spindle.
2. Taking Cuts That Are Too Aggressive
Beginners often assume that bigger cuts save time. In practice, aggressive cuts break tools, damage workpieces, and produce poor finishes. Start light and increase gradually. You will develop a feel for what your machine can handle.
3. Ignoring Chip Appearance
Chips tell you a lot about the cut. Long, stringy chips in aluminum often mean the feed rate is too low or the tool is not sharp. Discolored chips indicate excessive heat. Dust-like particles suggest the tool is rubbing rather than cutting. Learn to read chips and adjust accordingly.
4. Neglecting Measurement
Machining is a process of incremental material removal. If you do not measure between operations, you will overshoot dimensions. Use calipers, micrometers, and edge finders consistently. Measure twice, cut once applies to machining as much as carpentry.
5. Forgetting Safety Basics
Safety glasses are non-negotiable. Loose clothing, long sleeves, and jewelry are hazards around rotating spindles. Keep the work area clear of chips and debris. Never reach into a running machine. These rules are simple, but they prevent the most serious injuries.
Building a Sustainable Machining Workflow
Machining is a skill that compounds with practice. The more parts you make, the better your setups, tool selection, and troubleshooting become. A structured workflow helps.
Document Your Jobs
Keep a notebook or digital log of every job. Record the material, tooling, speeds, feeds, and results. When you encounter a problem, note the solution. Over time, this log becomes your personal machining reference.
Build a Tool Library Gradually
You do not need a full tool catalog to start. A basic set of end mills, a few drill bits, a face mill or fly cutter, and measuring tools cover most beginner projects. Add tools as your projects demand them.
Learn From Structured Resources
Video tutorials are an excellent way to see setups and techniques in action. Machining-focused channels demonstrate everything from basic mill operation to advanced 3D machining and metal cutting techniques. Watching an experienced machinist work through a setup teaches details that written instructions cannot capture.
Apply the Same Discipline to Other Skills
The workflow thinking that makes machining successful—planning, executing in steps, measuring results, and iterating—applies to almost any technical or creative pursuit. If you are building content around your machining projects, the same structured approach works. Platforms like AgentBooks turn domain expertise into a repeatable content system, which is useful if you document your machining journey or run a business around custom parts. The principle is identical: define the goal, break it into steps, execute consistently, and refine based on results.
Tools and Resources for Continued Learning
Measuring Tools
- Calipers: Digital or dial, for quick outside, inside, and depth measurements.
- Micrometers: For precise measurements down to 0.0001 inches.
- Edge finder: Locates the edge of a workpiece relative to the spindle.
- Dial indicator: Checks runout and alignment.
Cutting Tools
- End mills: The workhorse of milling, available in various diameters and flute counts.
- Drill bits: For holes; spot drills prevent wandering.
- Face mills and fly cutters: For producing flat surfaces efficiently.
- Chamfer tools: For breaking sharp edges.
Learning Resources
Structured video series are the fastest way to absorb machining fundamentals. A full introduction to mills explains when and how to use a milling machine in a typical workflow. Beginner-focused content that starts from zero—assuming no prior knowledge—is especially valuable when you are just getting started.
For written references, machinery handbooks and tool manufacturer catalogs provide authoritative speed and feed data. Bookmark the charts for the materials you use most often.
Related reading
- Organic Growth: Strategies, Metrics, and a Modern Playbook - Learn what organic growth means, how to measure it, proven internal strategies, and how content engines turn owned channels into compounding revenue.
- Machined Free Trial: What You Get and How It Works - Find out what the Machined free trial includes, how long it lasts, plan limits, and whether it fits your AI content workflow before you pay.
- AI Visibility Monitoring: Tools, Metrics, and Workflows - Learn how AI visibility monitoring works, which metrics matter, how to evaluate tools, and how to turn AI search citations into a repeatable content workflow.
Sources and further reading
- Machining-Tutorials - Explore the art of machining through our captivating videos, designed for everyone from beginners to experts. Whether you're diving into machining for the first time or you're an experienced craftsman, our channel offers a visual feast that showcases the beauty of metalwork. Join us as we delve into a variety of techniques, demonstrating the precision and creativity behind 3D machining and metal cutting. Our content is crafted for all ages and levels of knowledge, inviting those who are simply curious about machining to witness the mesmerizing process of transforming metal into intricate designs. Let's embark on this journey together, where technology meets craftsmanship.
- Machining Fundamentals: Introduction to Mills - This Machining Fundamentals episode is a full introduction to Mills, where you’ll learn the basics of when and how to use a milling machine in your workflow....
- Getting Started In Machining - Absolute Beginners Click Here! - This episode on Blondihacks, I'm showing you how to get started in machining as hobby from nothing! Exclusive videos, drawings, models & plans available on P...
Frequently Asked Questions
What is the difference between machining and CNC machining?
Machining is the broad category of subtractive manufacturing processes. CNC machining is a subset where a computer controls tool movement. Manual machining relies on human operation of handwheels and levers. Both remove material from a workpiece, but CNC adds automation and repeatability.
How much does it cost to start machining as a hobby?
A basic benchtop mill or mini-lathe costs between $500 and $2,000 new, with used machines often available for less. Tooling, measuring instruments, and workholding add another $300 to $800. A realistic starter setup totals $1,000 to $3,000, depending on whether you buy new or used equipment.
What is the easiest material for beginners to machine?
Aluminum 6061 is the most forgiving beginner material. It cuts easily, produces clean chips, and does not require aggressive tooling. Brass is also easy to machine but costs more. Mild steel is workable but requires slower speeds and sharper tools. Avoid stainless steel and hardened materials until you have more experience.
How do I know if my feeds and speeds are correct?
Watch the chips and listen to the machine. Healthy cuts produce consistent chips and a steady cutting sound. Chattering, squealing, or discolored chips indicate problems. Start with conservative values from tool manufacturer charts and adjust gradually. When in doubt, reduce depth of cut and feed rate.
Can I learn machining without formal training?
Yes. Many hobbyist machinists are self-taught through video tutorials, books, and hands-on practice. The key is to start with simple projects, follow safety rules strictly, and build skills incrementally. Makerspaces and community workshops often offer introductory classes that accelerate the learning curve.
What safety equipment do I need for machining?
Safety glasses are mandatory. Hearing protection is recommended for extended work. Avoid loose clothing, long sleeves, jewelry, and anything that can catch in rotating parts. Keep a fire extinguisher nearby if you work with flammable cutting fluids. Never leave a running machine unattended.
Conclusion
Machining is a skill built through deliberate practice, not a talent you either have or do not. Start with the fundamentals: understand the machines, plan your jobs, learn feeds and speeds, and complete simple projects that build confidence. The parallel clamp project teaches the four core milling operations in a single afternoon. From there, each new project adds a technique, a tool, or a material to your repertoire.
The same discipline that makes a good machinist—structured planning, consistent execution, and continuous refinement—applies to documenting and sharing what you learn. Whether you are machining for a hobby, a side business, or a full manufacturing operation, the workflow thinking scales. For those building content around their machining expertise, tools like AgentBooks can turn that knowledge into a consistent publishing system, much like a well-planned machining operation turns raw stock into finished parts.
Pick a project, gather your tools, and make the first cut. The rest is just chips.